


Fits MKS HV6130 Servos.
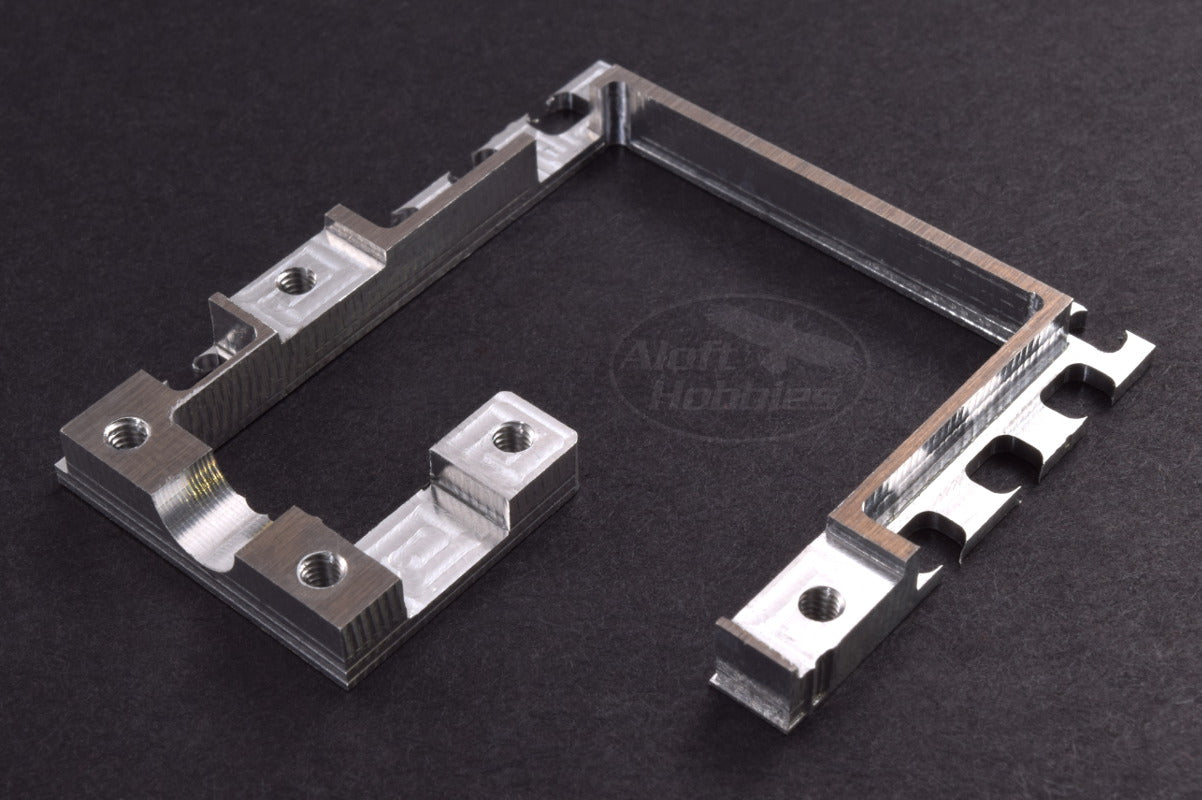
Dynamic Soaring world record holder Spencer Lisenby has designed a billet aluminum servo tray with out-board ball bearing support that has been designed to work with the MKS 6130HV wing servo. The servo frames are designed to transfer the servo torque loads to the wing skin over a wider area thereby reducing flexure. The frames outboard ball bearings carry some of the servo torque load which reduces stress on the servos and improves overall control surface precision. Finally the servos are held into the servo frames using machine screws, making installation and removal of the servos very easy.
What else can I say, Spencer flies over 500mph with this kit, and they hold fast.
The tray is designed to be epoxied onto the interior wing skin. Spencer has kindly shared his installation tips and tricks with us in the documentation below.
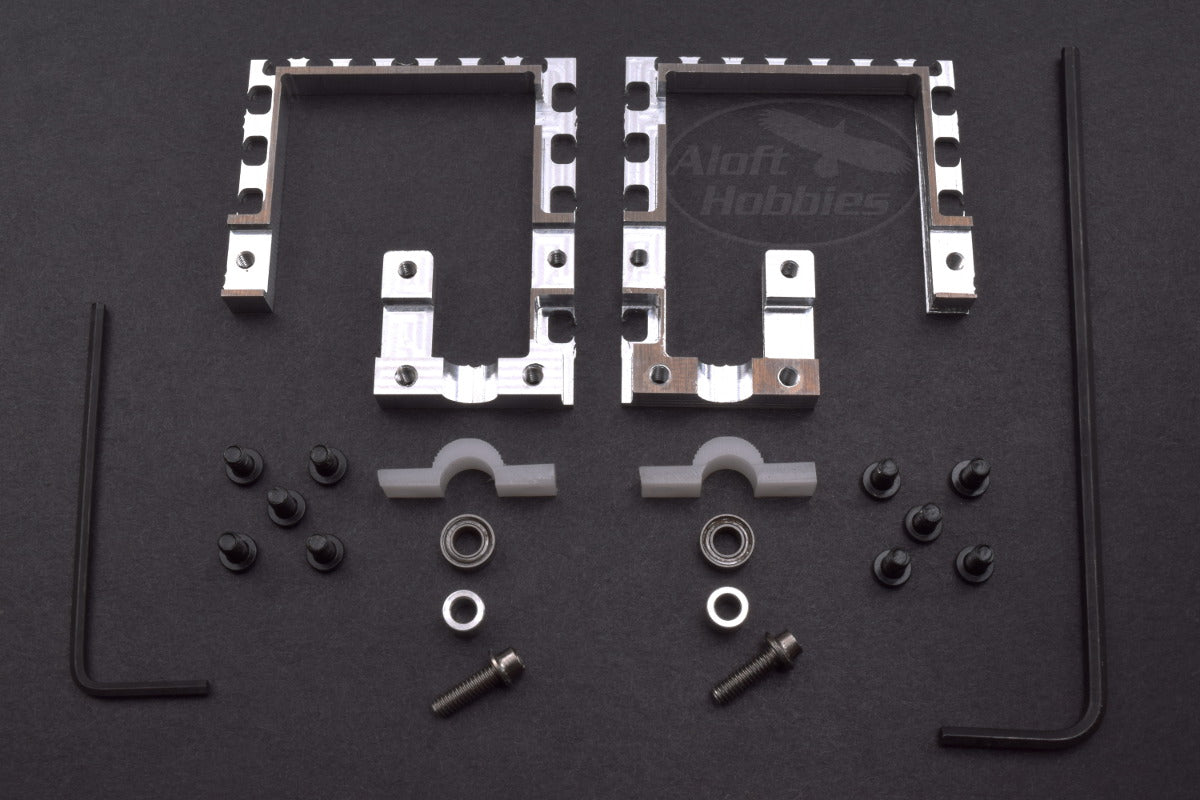
What do you get? The frames do not come with servo horns, those can be found in the links below. The frames are sold in pairs and come with the following hardware.
Installation Instructions:
These aluminum frames were designed to provide a solid, removable installation of the MKS HV6130 with the additional security of an external bearing support.
The design centers around a small footprint and a guarantee of minimum overall installation thickness. You will notice that the servo mounting tabs overhang the frame slightly. This allows you to sand the servo tabs to reduce the overall chord-wise footprint for tight installations. You will notice that the flange of the frame is slightly recessed with the servo installed. This is intentional and a helpful feature that ensures no more than 10mm of thickness is required regardless of wing curvature or ramps up to adjacent core materials or spar-caps. With this design, it is important to install the frame and the servo together at the same time with all screws fully tightened before the epoxy cures. If you were to install the frame first and let the epoxy cure, then the servo would contact the skins prematurely and cause deformation once the screws are tightened. If installed together, however, the uncured epoxy conforms to the skins and fills any gaps ensuring a perfect fit without interference.
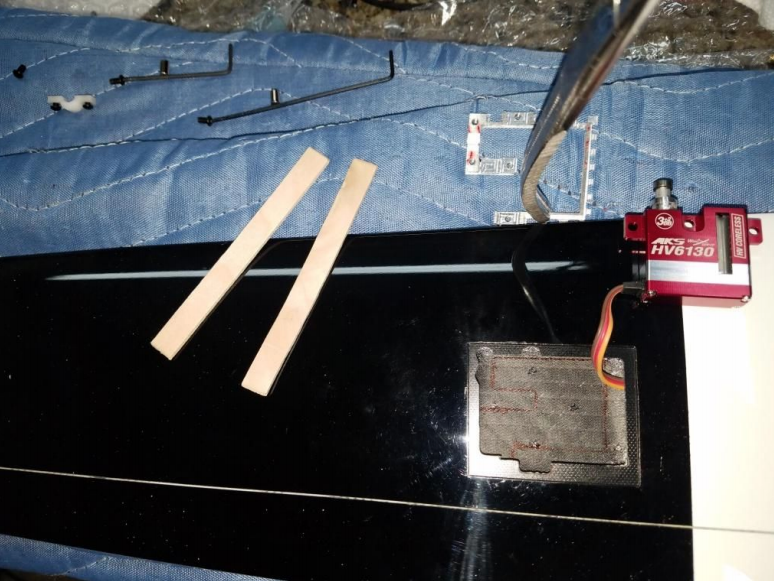
Before installing your frames, it is suggested to power up the servo and mount it to the frame with screws fully tightened. Check all clearances and ensure that there is no binding. Next, remove the servo and use a fine tipped marker to outline the frame on the inner wing skin so you can see where to prep and apply epoxy. It is recommended to glue the frames in place using a thickened and reinforced epoxy. It's certainly not the strongest option but I have been successful using simple 5min epoxy with cabosil and chopped glass. There are certainly more robust epoxies such as the Loctite/Hysol line which are designed for bonding to aluminum but the frames are heavily scalloped to allow enough mechanical entrapment to accommodate a less than optimal bond strength to the aluminum.

On models with larger servo windows, the frame can be epoxied in place with the servo already mounted and screws fully tightened. After applying a modest amount of epoxy to the inner wing skin, apply a more generous amount to the frame itself on both top, bottom, and sides being sure to fill all of the scalloped edges. Position the assembly as desired and hold or weight until epoxy has set. Be sure to prevent any excess epoxy from pushing out under the servo arm and causing a problem.

If you are concerned about excess epoxy bonding to the servo and preventing easy removal, you can wax the servo before mounting (although experience shows that it's typically not necessary if using 5min epoxy). On models with limited space, and smaller servo windows (ie K2mDP), you may be unable to install the frame with the servo already mounted. Instead, I recommend that you apply epoxy to the wing skin and empty frame first. After placing the frame in position, you can remove excess epoxy from the servo area using a popsicle stick that has been cut square on the end. If you used a-lot of epoxy, you may have some push up through the screw holes. If this happens, remove as much as possible with a toothpick before installing the screws and tightening completely before any epoxy cures. Again, check for any binding and confirm proper alignment until epoxy cures.
